
Evaporator Coil Repair in the USA
Evaporator coils sit in the indoor unit and pull heat from house air into the refrigerant. When they ice over or leak, the system loses capacity and runs longer cycles that raise humidity levels. Ice HVAC technicians start by confirming airflow across the fins before touching any refrigerant lines.
Low refrigerant charge from a pinhole leak starves the coil of the volume needed to boil properly. Dirt buildup or a clogged filter reduces heat transfer and drops suction pressure. Our crews check static pressure first to separate airflow problems from actual coil defects. Airflow restrictions signal need for Ice HVAC on evaporator coil repair jobs throughout USA via AC Repair homepage.
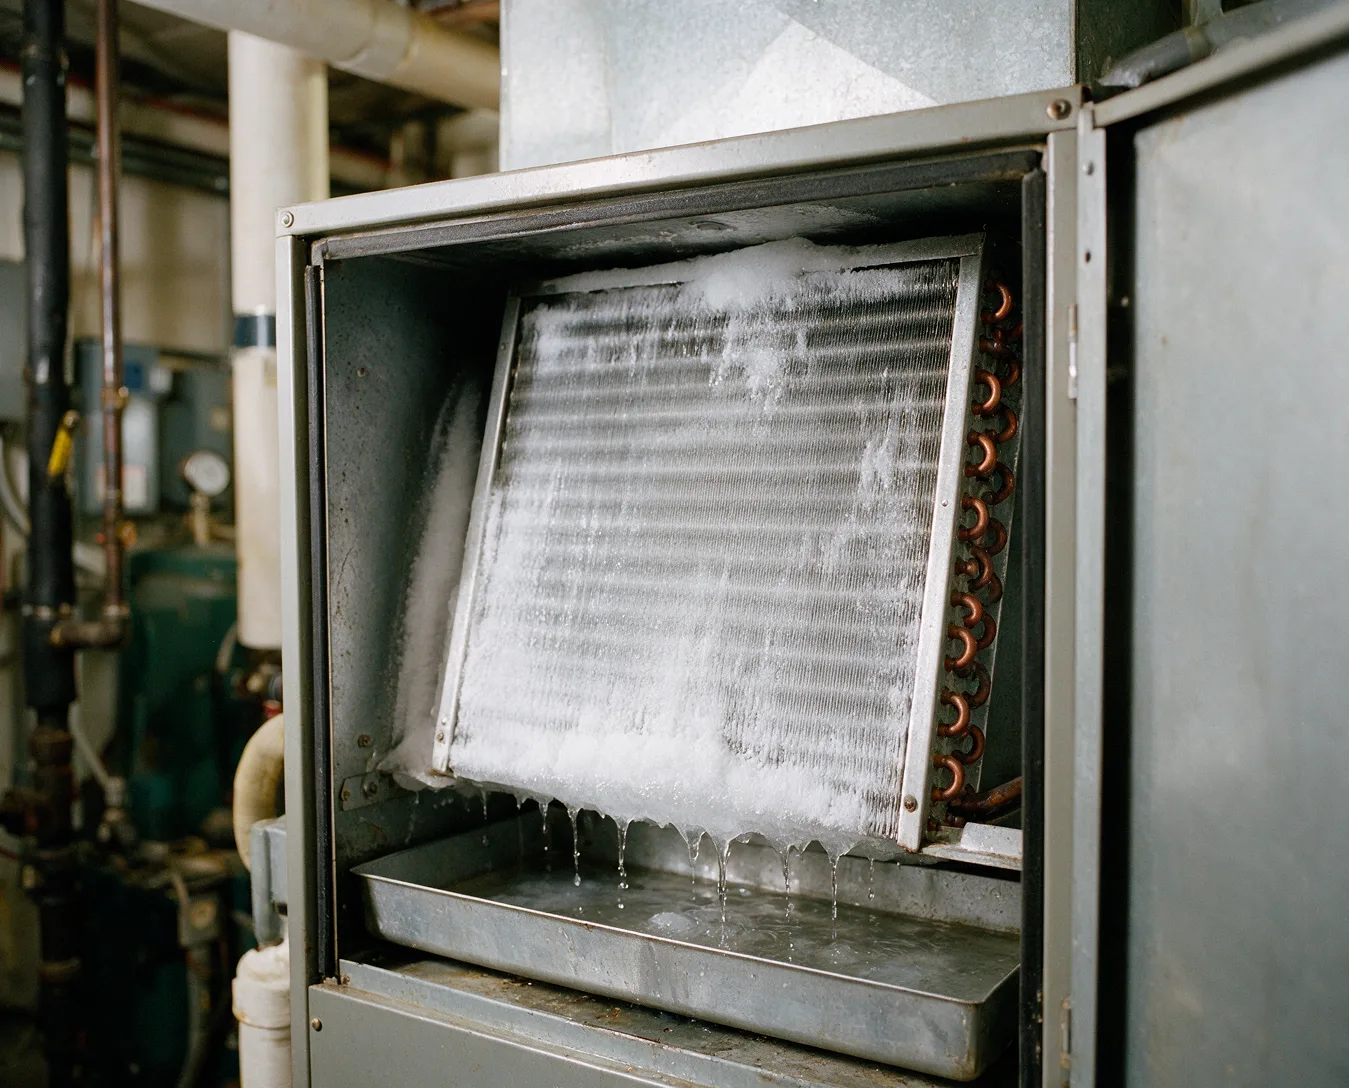
Warning Signs
- Supply air feels warmer than normal
- Ice forms on the indoor refrigerant lines
- Water drips from the air handler
- System runs continuously without cooling
- High indoor humidity persists
Common Causes
A dirty air filter cuts airflow and lets the coil temperature fall below freezing. Moisture then turns to ice and blocks the remaining passages. Ice HVAC crews always verify filter condition and blower speed before they open the system.
Corrosion from condensate or previous refrigerant leaks eats through aluminum fins and copper tubing. Vibration from the blower motor can fatigue solder joints at the distributor. Each of these failures drops suction pressure and raises compressor workload.
Technician Inspection Steps
Technicians attach gauges to read suction and liquid pressures, then calculate superheat and subcooling. They use a thermometer to measure temperature split across the coil and compare it to design specifications. Low superheat points to a flooded coil while high superheat signals a starved coil.
Next they pull the access panel and inspect fins for dirt, mold, or physical damage. A nitrogen pressure test locates leaks without releasing refrigerant into the air. Only after these measurements do they decide whether cleaning, leak repair, or coil replacement is required.
Repair and Replacement Choices
When fins are blocked but the coil holds pressure, technicians clean with a no-rinse coil cleaner and restore airflow. Small leaks in accessible return bends can sometimes be repaired with silver solder after the refrigerant is recovered. Most modern coils use aluminum tubing that requires replacement once a leak appears.
Replacement involves recovering the refrigerant, cutting the old coil out, and brazing the new one into the lineset. Technicians then pressure test, evacuate to 500 microns, and recharge to the correct weight. Ice HVAC carries common sizes of evaporator coils for quick changeouts.
What to Check First
Homeowners should replace the air filter and confirm the blower runs at the correct speed. Clear any obvious debris from the return grille and make sure supply vents are open. These steps often restore enough airflow to stop the coil from icing.
If warm air and ice persist after a fresh filter, shut the system off at the thermostat to prevent further compressor strain. Note the indoor and outdoor temperatures and the location of any visible ice. Call Ice HVAC with those details so the technician arrives with the right gauges and coil options.
Evaporator Coil Repair questions
Why does the evaporator coil ice up?
Restricted airflow from a dirty filter or closed vents drops coil temperature below freezing. Refrigerant then condenses moisture into ice that blocks heat transfer and raises humidity inside the house.
Can a leaking evaporator coil be repaired?
Small accessible leaks in copper return bends can sometimes be brazed after refrigerant recovery. Most aluminum coils require full replacement once a leak develops because the tubing cannot be reliably repaired in place.
What measurements do technicians take on site?
They read suction and liquid pressures, calculate superheat and subcooling, and check temperature split across the coil. These numbers separate airflow issues from refrigerant charge or coil defects before any repair begins.
How long does evaporator coil replacement take?
Recovery, coil swap, brazing, pressure test, and evacuation usually require four to six hours. The exact time depends on access to the air handler and whether line set modifications are needed.
Evaporator Coil Repair
Contact Ice HVAC when warm air or ice on the lines indicates coil trouble.